Pages

Showing posts with label laura. Show all posts

Monday, March 28, 2011

Perfect Timing

So Brandi Jo, Laura, and I met up for our 2nd craft date yesterday.
This time we had decided to make fabric clocks.

I started out with an 8x10 blank canvas.

I had this cute fabric sitting around and I figured it would be perfect for my clock!
So I hot glued the fabric to the back of the canvas.

I liked it already before it had any numbers or the actual clock on it.

So I cute though the fabric and canvas with an exacto knife and slid the front part of the clock through.

I made sure the back of the clock was flush with the canvas before I put any screws on or anything.

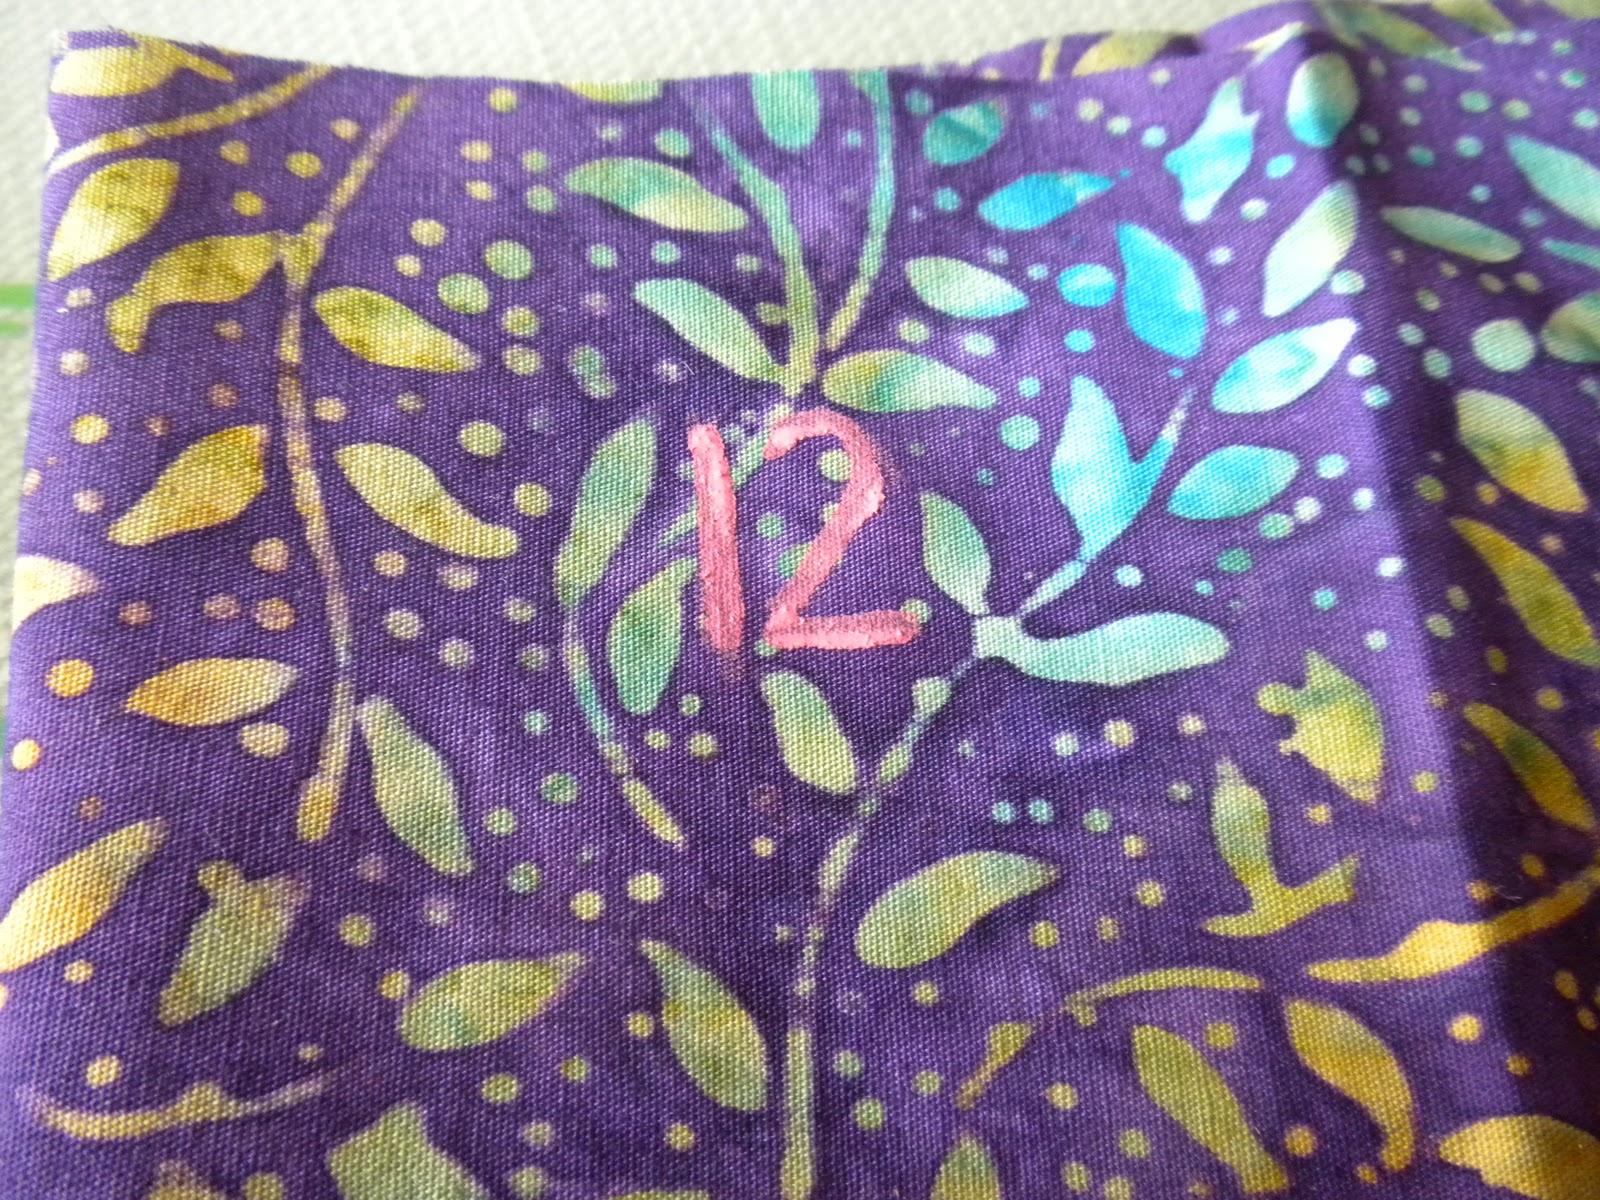
I knew that I needed to add numbers so I looked for a color that would stand out but not be too crazy.  I found this pink that I thought would be perfect and went with it.

Brandi Jo had these cute stamps and I knew they would be perfect.

So I lined them all up where I wanted them to be.

I painted each of the stamps and stamped them onto the fabric.  I then painted the numbers a little more once they got on the fabric to make them stand out.
Once the paint dried I mod podged over the top to give it a more finished look.

I absolutely love the end result.  I hung it about my tv in the living room.  The only thing I was worried about was it not keeping the correct time.  I had to work with the screw that tightened it because if it was too tight both hands moved but if it wasn't tight enough the hands would move on right.  So it took a little bit but I finally accomplished it!

Tuesday, March 22, 2011

Quick and Easy Wall Hanging

I have always loved this saying!  Laura and I decided to make a Eugene trip to get more craft supplies because we were both running low on almost everything.
I am so glad I went!
I was debating on what I wanted to put the saying on and was looking at wood when I came across this iron platter.  As soon as I saw it I knew it would be perfect.

Once I got the saying out of the wrapping I started by taking it away from the backing.  I know from previous experience it doesn't always want to cooperate.  So I took my time.

Once I finally got the backing off, I transferred it to my platter. I rubbed each individual letter with a popsicle stick I had laying around.  Then I started pulling it at a 45 degree angle being sure everything stayed where it was supposed to be.

And I was so pleased everything stayed put and turned out nice!

After everything had been transferred to the platter, I was debating on how to hang it.  I had bought some silky ribbon in a purple that I just loved.  I am so glad I did because I think it gave it a little character.

I had a blank wall in my living room that I had been dying to put something on.  This is the first thing I have loved enough to put on the wall.  I think it definitely gives the room a little more character.

Homemade Chalkboard Gifts


This was such a fun and easy project!  After I used the chalkboard paint at Brandi Jo's I had to run out and buy my own.  Then I decided since they turned out so cool I needed to give one to all of my friends and family.

So Fred Meyer was having a picture frame sale and I thought these would be perfect!

So I went and sprayed 2 coats of chalkboard paint on the glass part.
I let it dry for 24 hours and rubbed chalk all over it like the can said.
Then rubbed it off.
After I did that I used acrylic paint and painted the different sayings on top of the chalkboard paint.
And here's what some of the end results.


Fun and easy project personalized gift.

Friday, February 18, 2011

Burlap Wreaths

This is what we did on our craft day 2/13/11.

We all met at Brandi Jo's for a girl's (Laura, Londi, Meagan, Brandi Jo of course, and me.....Cassidy) craft day.  Everyone's wreath had personal variations.  I made mine for a wedding gift for a wedding I'm going to in September.  I will definitely be making more of these.  They are labor intensive but not difficult.

 Here is the step by step.

Step 1--We laid the burlap out on a flat surface.  We used the floor.

Step 2--We used a ruler to measure our strips.  We measured 4 inches to get it thick like the picture about but you can do as thin or thick as you like.

Step 3--Once we had cuts in the burlap 4 inches apart.  Brandi Jo showed use a trick to make our strips straight.  You find a string from either side of the slit and pull it gently.  Sometimes it breaks off but you can grab it again once you get down to where the string broke.

Step 4--When all the strings were pulled, we cut the strips.

Step 5--After the strips were cut, we took wire hangers and un-did them and made them into a semi circle.

Step 6--Once the hangers were in a semi circle we fed the burlap strips on back and forth in the middle, so it looked like an inchworm moving.

Step 7--Once all the  strips had been fed on, we made the hanger into a circle and wire wrapped the ends around each other.

Step 8--After the wire wrapping was done, we started on our details pieces.  For mine I had bought a wooden letter R and wanted to add some blue and purple flowers to mine.

Ad you can see from the picture I didn't want them all to be the same, I wanted the blue and purple flower to be in the center.
To make the flowers, I cut circles out of fabric freehand.  Then glued the different pices together. In the center of the flowers I hot glued pearl-looking buttons.  To make them have a multi-dimensional look we added some hot glue and squeezed them together.

To make it look full you just have to mess with it a little bit and move the burlap along the wire.

We had a blast making them and are going to try to do a craft together each month.